Prototyping Install Prototype Kit on Mac
Overview
Getting set up
Before you start, you will need to download and install the following:
1. Install Git
Git is an open-source tool that helps track changes in code and makes it easy for multiple people to work on the same project.
There are several options for installing Git on macOS. Note that any non-source distributions are provided by third parties, and may not be up to date with the latest source release.
For ONS MacBook, we recommend using Homebrew for the git installation. Please refer to Git - Downloading Package (opens in a new tab) for more options.
1.1 Install Homebrew
To install or upgrade Homebrew, open a terminal on your Mac and run the following command:
/bin/bash -c "$(curl -fsSL https://raw.githubusercontent.com/Homebrew/install/HEAD/install.sh)
Allow the installation to complete and follow the recommended steps at the end of the installation to add Homebrew to your system path.
1.2 Install Git
To install or upgrade Git, open a terminal on your Mac, run the following command and allow the action to complete.
brew install git2. Install Node.js
Node.js is an open-source tool that runs JavaScript outside the browser. It’s designed to build fast and scalable applications.
This guide uses the fnm method to install Node.js.
To view alternative download options, visit Node.js (opens in a new tab) (opens in a new tab)
Follow the steps below to install Node.js using the fnm method.
2.1 Install fnm
Fast Node Manager (fnm) is a Node.js version manager designed for speed and simplicity, installing with a single file and instant startup.
To install or upgrade fnm, open a terminal on your Mac and run the following command. Accept all prompts and allow the installation to complete.
curl -o- https://fnm.vercel.app/install | bash2.2 Install Node.js
To install or upgrade Node.js, open a terminal on your Mac and run the following command. Accept all prompts and allow the installation to complete.
fnm install 222.3 Verify Node Version (Optional)
To check your installed Node.js version, enter the command below in to the terminal.
node -v2.4 Verify NPM Version (Optional)
To check your installed Npm version, enter the command below in to the terminal.
npm -v3. Install Yarn via npm
Yarn is a popular open-source package manager for JavaScript projects. It helps install, update, and manage dependencies efficiently, making development faster and more reliable.
The recommended way to install Yarn is through npm package manager (npm) (opens in a new tab) , which is included with Node.js (opens in a new tab) .
To install or upgrade Yarn, open a terminal on your Mac and run the following command:
npm install --global yarn
Check that Yarn is installed by running the following command:
yarn --versionInstalling the prototype Kit
You will need Git, Node.js, and Yarn to run this project locally. Please ensure you have implemented the steps mentioned in the previous section.
4.1 Local git configuration
Make sure your local git configuration is set up to use 'main' as the default branch when initialising a new repository. Launch a command terminal on your Mac, and run the command below.
git config --global init.defaultBranch main4.2 Create a prototype kit project
You will need access to GitHub to create a project for your prototype kit. If you do not have a GitHub account, create one first, or ensure you are signed in before proceeding.
Clone the ONS prototype kit in to your new project by using:
Follow the steps below, on the GitHub page:
- Do not tick the Checkbox labeled: "Include all branches"
- Choose an owner: Select your account from the dropdown filter.
- Repository name: Enter a clear, convenient name for your repository, such as my-ons-prototype-kit. This will also be the name of the local folder on you Mac for this project.
- Optional description: You may include an description for your repository.
- Set repository visibility: Select Private if you would like to have control over who can view and contribute to your project.
- Create your repository: Click Create repository.
- Github will redirect you to your prototype kit project. Keep this browser window open to complete the next step.
4.3 Clone your prototype kit project to your MacBook
When you create a repository on GitHub, it exists remotely. Cloning it creates a local copy on your computer, allowing you to sync changes between both locations.
On GitHub, navigate to the main page of your repository. Open the repository with GitHub Desktop. Click on "Open with GitHub Desktop" to continue as shown below.

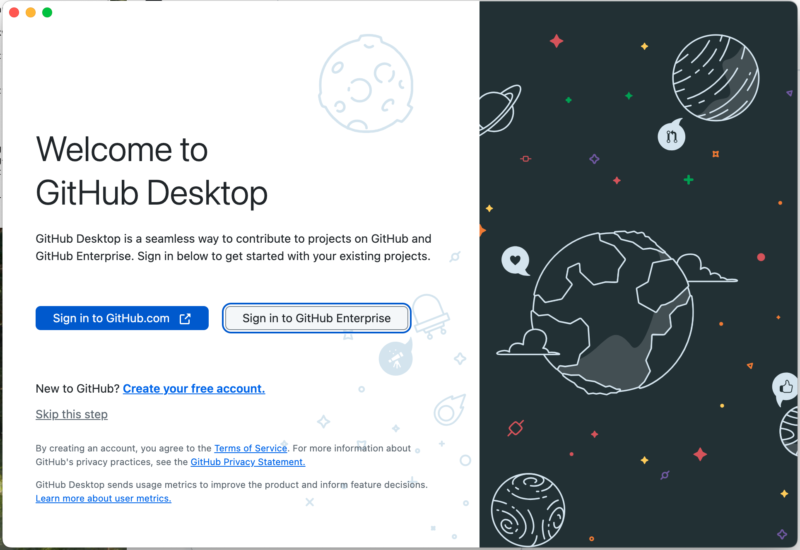
Select "Sign in to GitHub.com" as shown below to proceed.
If you are already signed in to GitHub, you will be asked to choose an account. Select a GitHub account. If not, you will need to enter your username and password. Click 'continue' to move to the next step.

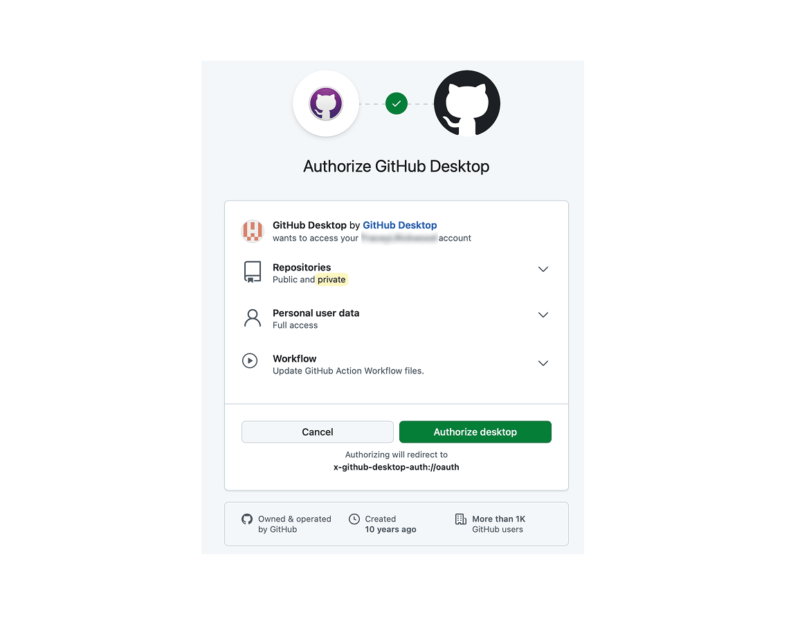
Click on 'Authorize Desktop' to proceed.
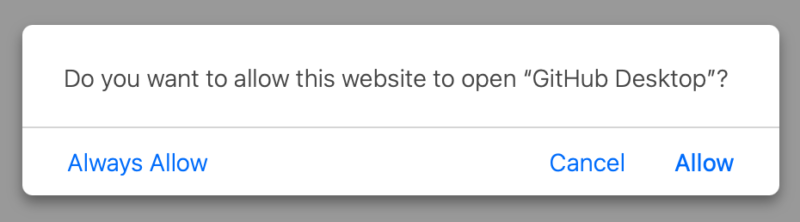
Click 'Allow' to confirm you wish to open GitHub Desktop.
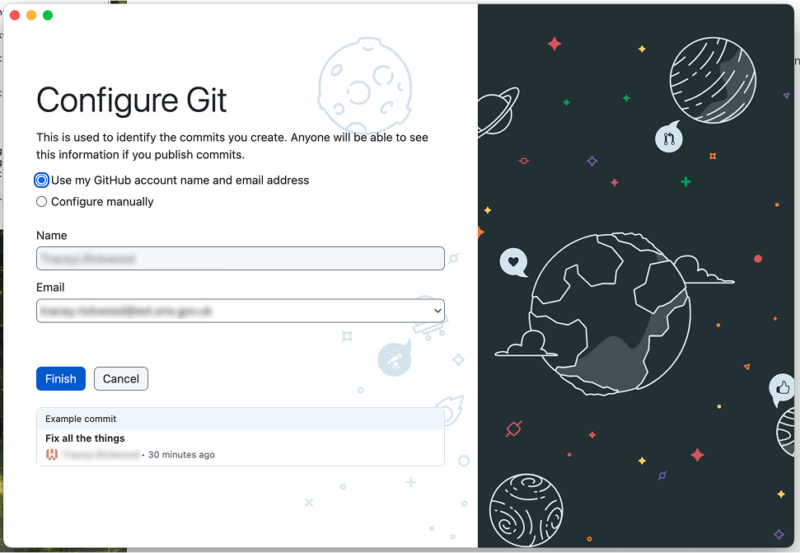
Configure Git using your GitHub account name and email address and then click 'Finish' to proceed.
Now that you have configured Git using your GitHub credentials, your repositories will be automatically listed as shown below.
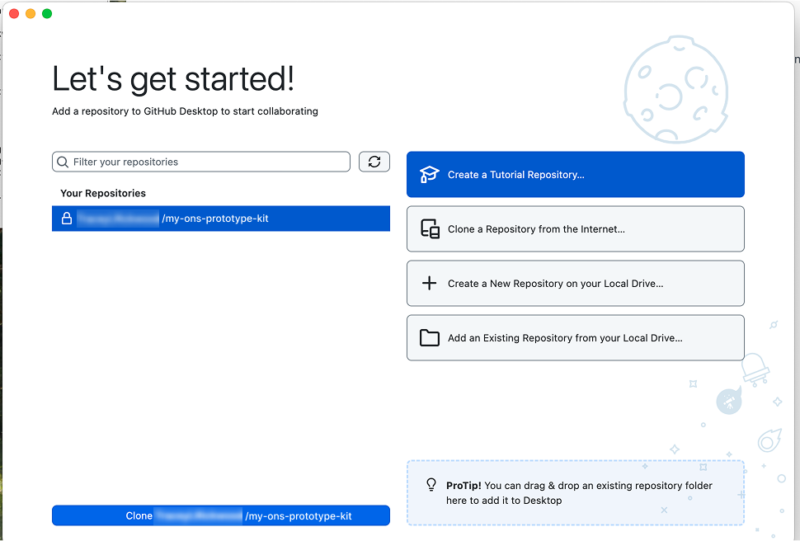
Select the Repository you would like to clone. This should match the name you select in the previous step named 'Create a Prototype kit Project'.
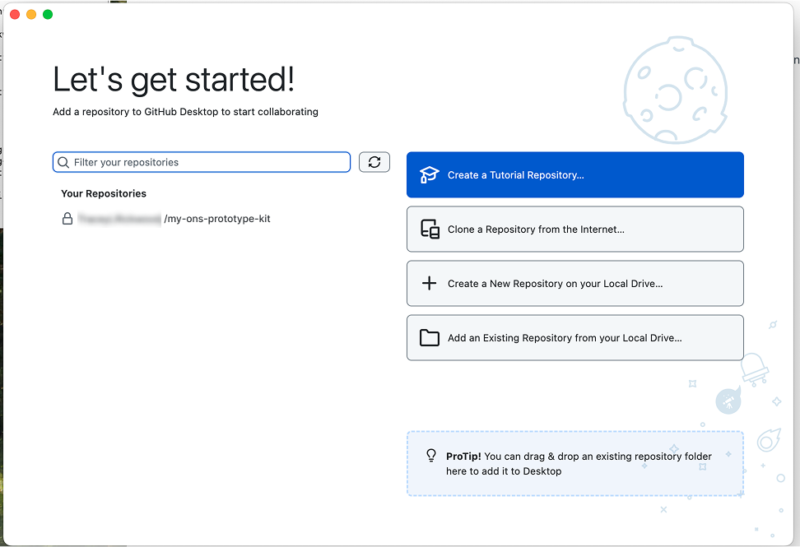
Select the repository you wish to clone and confirm using the 'Clone' button underneath
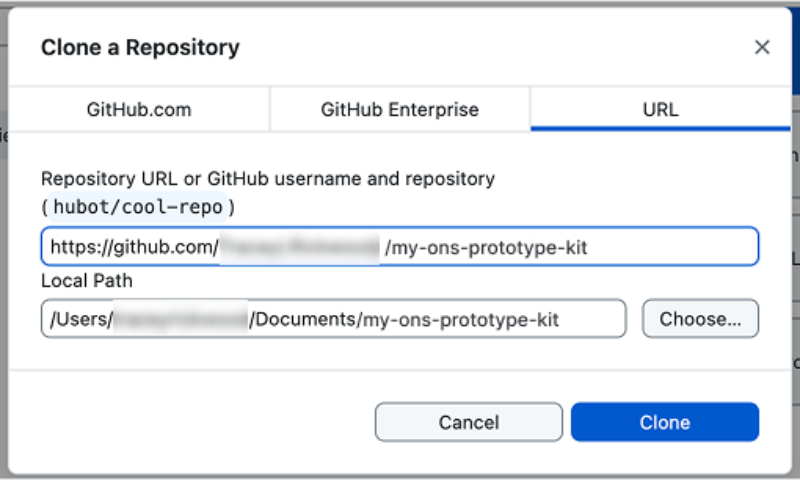
Use the URL option to clone the repository, as shown below. The repository URL and local path should fill in automatically. Do not change the repository URL. You can either use the default local URL or choose a different one such as the folder you created earlier.
4.4 Checking your cloned local prototype kit repository
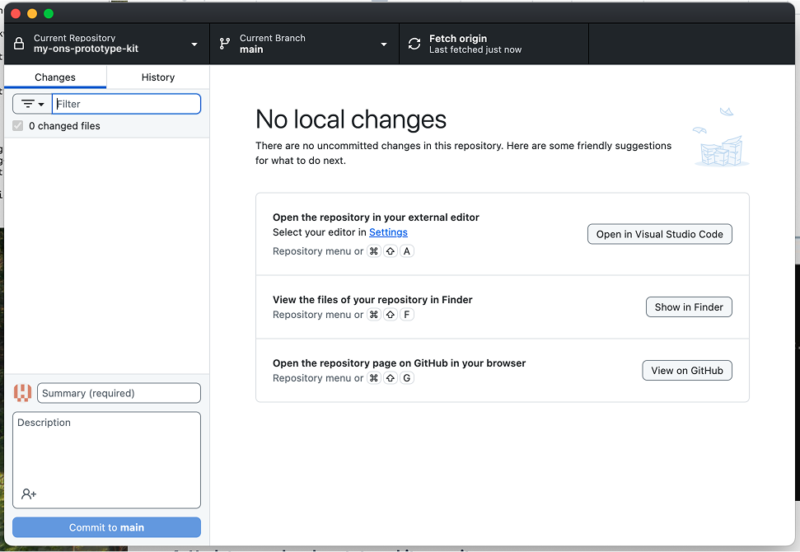
After cloning your repository, GitHub Desktop will launch your repository as shown below.
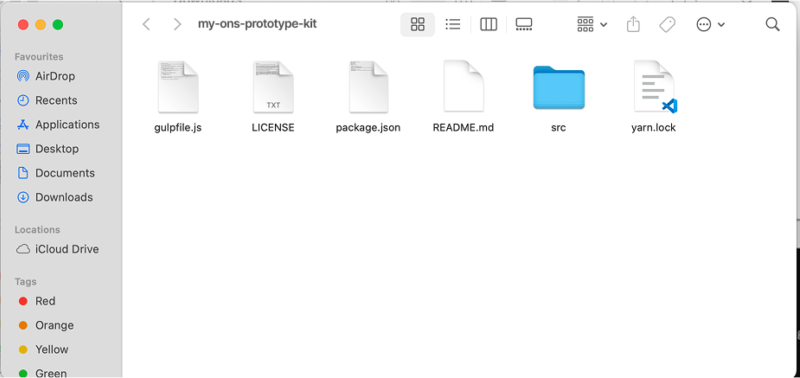
To locate your local path, click 'Show in Finder'. This will open the folder where your repository is saved, as shown below.
4.5 Update your local prototype kit repository
In the command terminal, change your local directory to the local path of the repository you have just cloned.
cd /Users/your-user-name/Documents/GitHub/my-ons-prototype-kit
Use the code block below to update your repository with the ONS design system. This will update the package.json and yarn.lock files so that other developers working on the project will get the same dependencies as you when they run yarn or yarn install. This will be useful if you have other developers needing to use the same repository later.
yarn add @ons/design-system5. Launching your local prototype kit
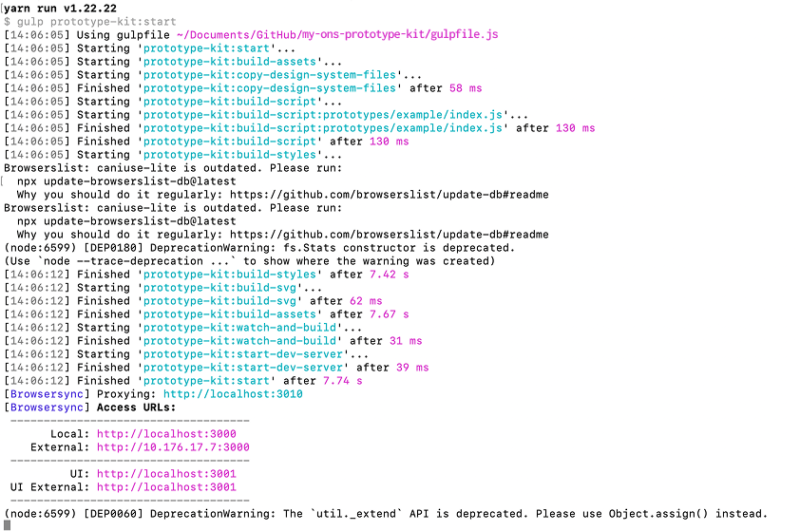
In the command terminal, use the code block below to launch your prototype.
yarn start
The terminal will run the commands shown below when launching your prototype. You will need to leave this terminal open to keep the prototype running.
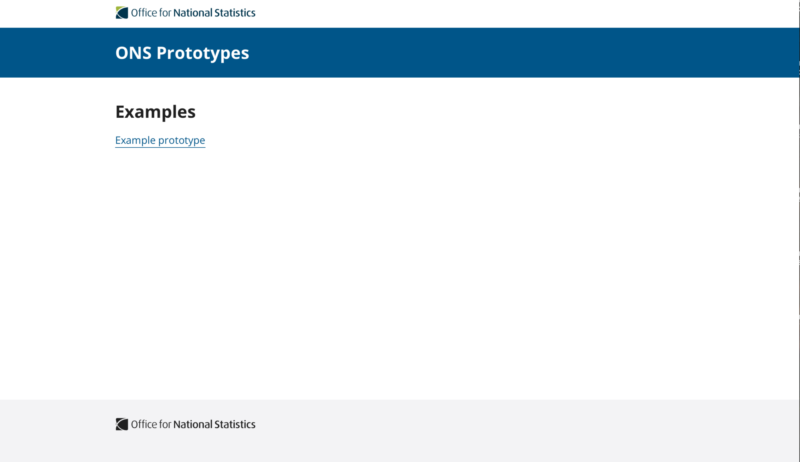
If you have followed all of the steps successfully your prototype will launch in a browser window as shown below.
To shutdown the prototype, type "CTRL+C" on your keyboard, within the same open terminal window.
Related documentation can be found below for more information on how to update your prototype.
Related documentation
Further help
If you need any help installing the prototype kit, or creating or publishing your prototype, email the design system team at ons.design.system@ons.gov.uk (opens in a new tab)